

An Unique design and the dot pattern makes this kolam to stand away from the traditional chikku kolam.
One of my favourite designs from my Amma’s collection
Two strand designs are the base for this kolam and they get quadruplicated to form the design. Altogether 4 plus 4 strands one in each category. .
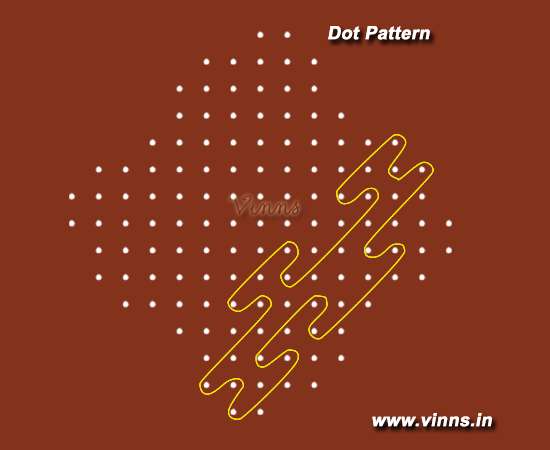
Dot count – 15 dots, a bit confusing pattern.. I have attached the dot pattern for a better understanding and step by step procedure too 🙂
Sikku kolam needs some amount of concentration while learning the pattern of the wavy lines running through the dots. Its the easiest pattern to draw as there is symmetry formed within the pattern, so if you get to know the knack of knowing the nature of the flow, then its an easy task to draw the kolam. I like to draw single line sikku kolams, where a single line runs throughout the kolam looping around the dots. Though it may seem to be confusing but it is the simplest one to draw, my personal opinion.

1. The dot pattern
I have given a clear picture of the dot count which follows an unique pattern. I have indicated the number of dots at the end to get for easiness. The dot pattern gets mirrored on the other side.
Tip. Once you place the right side dots, move to the opposite side and place the dots in same sequence instead of pacing dots on your left hand side. The same follows to the drawing of the strand.

2.The first strand
The strand which is the one of the two patterns in the kolam. This is the strand which gets duplicated.
3. The second
Just copy the strand. For easiness, if you can move to the opposite side and then start the strand ie. the top side and start to draw, it will be much easy to draw, my own experience… 😀

4. The second side
Repeat the design on other sides. Hope by now you get to know the pattern. If you trying on paper, just rotate the paper and start from the bottom as it will easy to draw.

5. The Joining Strand
The four strands have been formed, now the joining part. The magenta colour strand is the one which joins two loops, forming a 3×3 sikku dot kolam at the centre. Hope that is seen in the below image.

6. The remaining design
Join the remaining design with single design as seen below.

7. The Completed
Finish the kolam as seen below.
Hope by now you should agree me that this is an easy kolam to draw, no tangles, just straight loops looping in around the dots.


