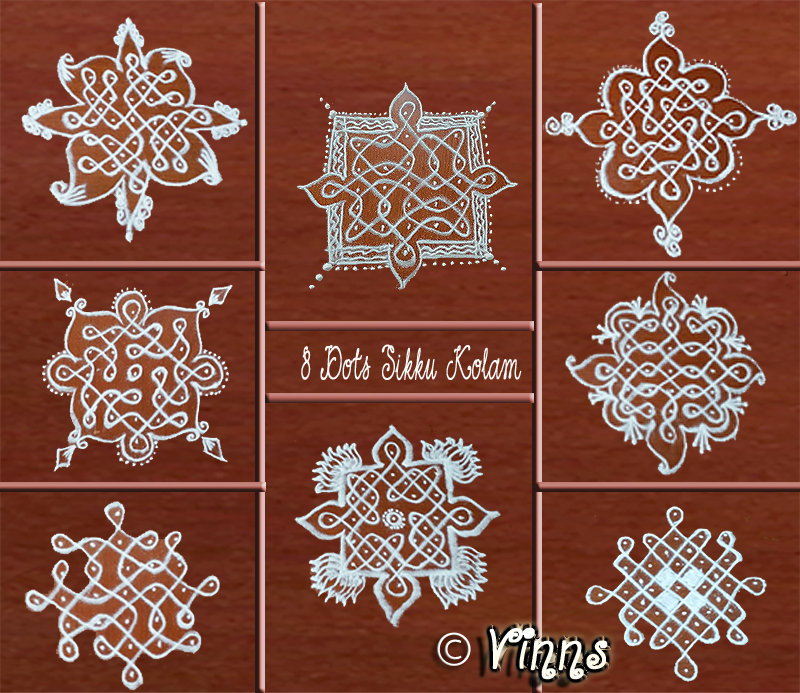
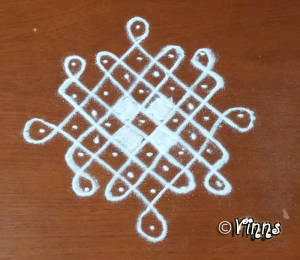
Total of 8 sikku kolams with a dot count of 7 is being posted in this post. These sikku kolams are easy ones for beginners to start with. The other set of 6 small sikku kolams will be posted in the next post. These kolams can be daily in the morning or evening. These are basic kolams which can be extended to a bigger kolams. I like to extend basic 5 dots kolams to a bigger ones by doodling around the extra dots apart from the 5 dots which get filled by the basic design. I have tried many kolams and have been tagged as “My Own Sikku Kolam Creations”
Click this for Youtube link to see the demo of the below kolams.
I love to create sikku kolams as I need to settle down with a dot count and takes some time to arrive the final design depending upon the mind set 🙂 Usually free hands are at the spur of the moment, I don’t do any homework, nor draw a sketch on paper before drawing the kolam on the floor. But at times there are flop ones, which are inevitable 😀
Here comes the 8 sikku kolams. These are common ones, still enhanced with my imagination which gets into shape when I finish the kolams. you can add extra elements to shape up the kolam. Addition of colours or kavi will enhance the kolam and will look grand. A two collage of 7 dots are shared below, where each kolam is posted individually for a closer look.
Dot Pattern
Below is the dot pattern for the 7 dots kolams which are shared below to this dot grid image. If you want to practice, download this page and print for an hassle free drawing. In this dot pattern, 7 dots are placed in the centre grid, followed by 5 dots on sides in two columns, then concluding by 1 dot. This can be drawn in other ways. Place 5×5 dots grid and add a dot on sides.
Kolam No.1
Kolam No.2
Again 5 lines create this design. A single strand joins the single dot on sides. The other four strands form single loop to finish the design. I have added an outline to enhance the kolam. Create any design around with swirls or lotus to conclude the kolam along with colours.

Kolam No.3
5 Lines create this design. The first strand connect the side dots. “V” shaped strand join the dots above each single loop. An easy design to try. For enhancement, I have just outlined the kolam.

Kolam No.4
This is a single line kolam where a single line travels throughout the kolam forming square pattern. This may look bit tangled but once you get to know the pattern it is easy to draw on other sides too.. The design follows the pattern and its the same on the sides too. I have added border lines with straight and curvy lines for enhancement.

Kolam No.5
This is a two line kolam. The first line connects ands forms a loop around the single dot on sides. The next line joins all other dots and forms the design. The freehand design drawn on the outer are an indication that how a kolam can be enhanced with extra elements, its individual’s creativity to beautify the kolam.

Kolam No.6
Two line kolam. The first line connects the dots on sides and the other line forms loops without any tangles leaving the centre dot. In sikku kolam no dot is left unattended 🙂 It’s a customary that dots which don’t join into the loop are circled so that they don’t look aloof.

Kolam No.7
This is a single line kolam. The single strands traverse the whole kolam forming loops around and crosses the dots with ease. It may look bit confusing, but an easy one and can be tagged to beginner level kolams. An extension for enhancement and I stuck to simple fringe design around.
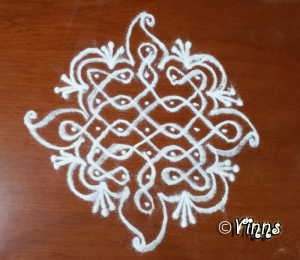
Kolam No.8
The last kolam in this dot pattern. 3 line kolam. The centre strand which connects the opposite sides of the kolam. Two strands in opposite direction form the centre centre, while a single strand intertwines and completes the design of the kolam. I didn’t draw any extensions for this kolam. You may add designs or colour for enhancement.


